About POP!

POP! is INQUIRER.net’s premier pop culture channel, delivering the latest news in the realm of pop culture, internet culture, social issues, and everything fun, weird, and wired. It is also home to POP! Sessions and POP! Hangout,
OG online entertainment programs in the
Philippines (streaming since 2015).

As the go-to destination for all things ‘in the now’, POP! features and curates the best relevant content for its young audience. It is also a strong advocate of fairness and truth in storytelling.

POP! is operated by INQUIRER.net’s award-winning native advertising team, BrandRoom.

Contact Us

Email us at [email protected]

Address

MRP Building, Mola Corner Pasong Tirad Streets, Brgy La Paz, Makati City

Girl in a jacket

Make your gifts look extra special with this DIY gift wrapping bow

KinderPOP!, Gift Wrapping, Bow, Crafts, DIY
REA NICO ALFONSO/INQUIRER.net

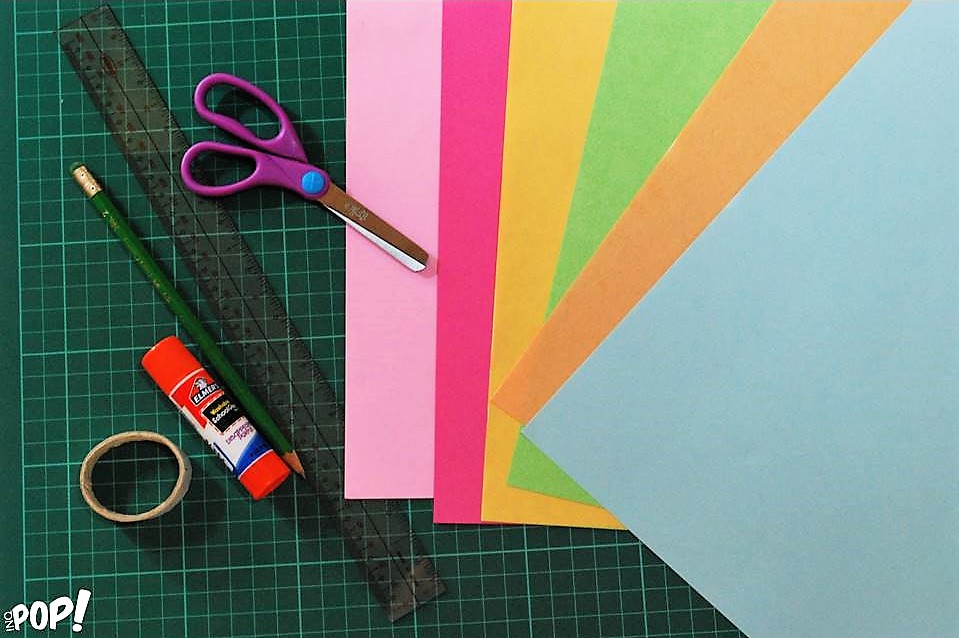
Materials You Will Need:

Colored Paper
Scissors
Glue or double-sided tape
Ruler
Pencil

What To Do:

1. Fold and cut your colored paper in half.

KinderPOP!, Gift Wrapping, Bow, Crafts, DIY
REA NICO ALFONSO/INQUIRER.net

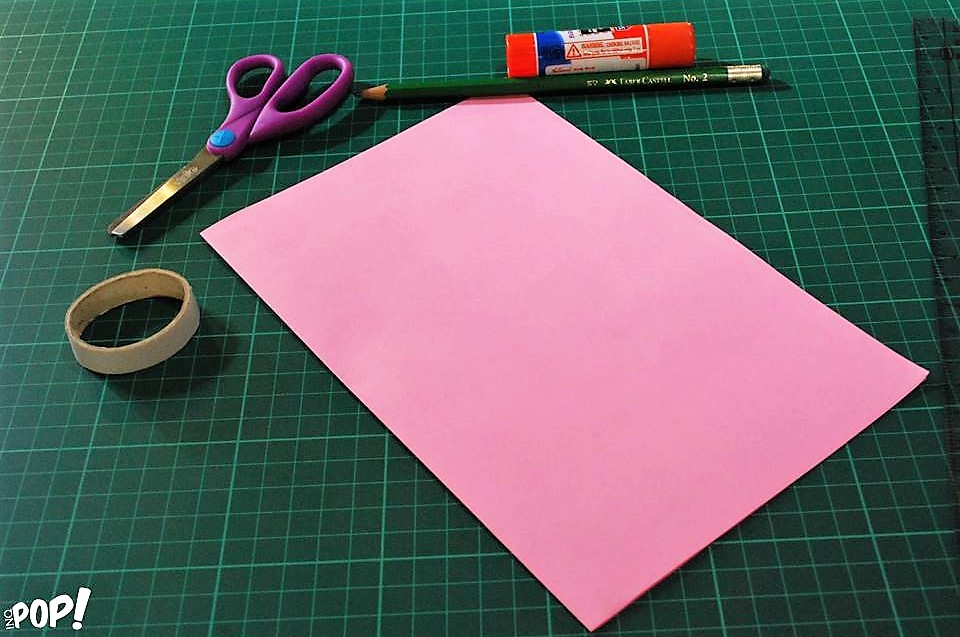
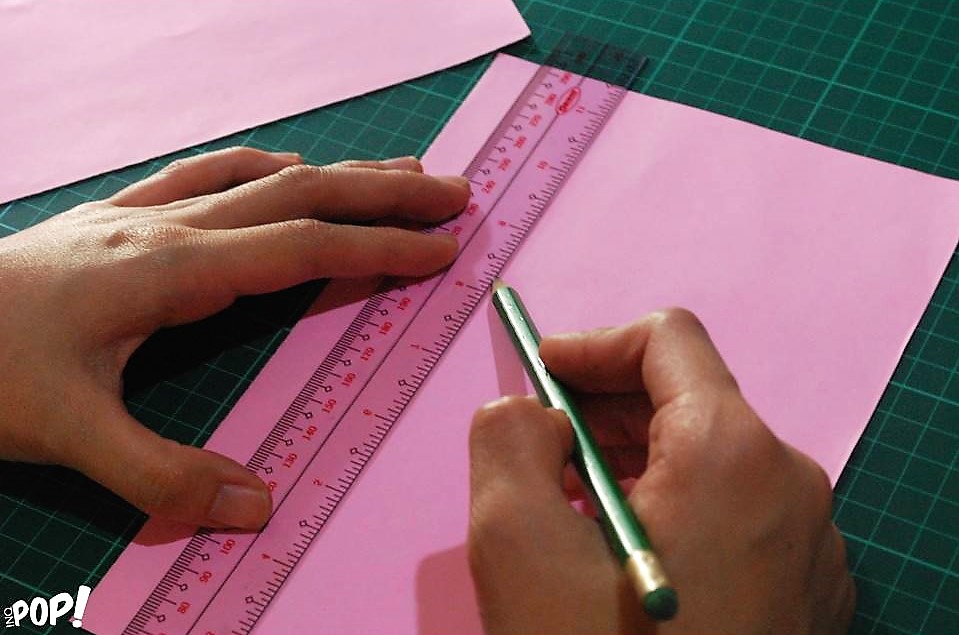
2. Using your ruler and pencil, draw 8 multiple vertical lines on your colored paper with a half-inch space in between.
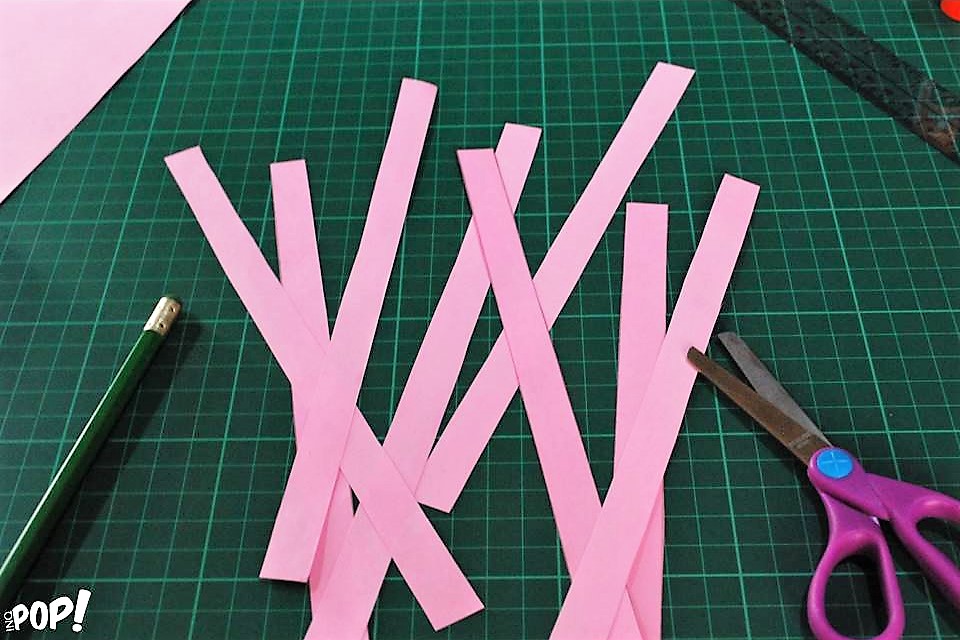
KinderPOP!, Gift Wrapping, Bow, Crafts, DIY
REA NICO ALFONSO/INQUIRER.net

3. Cut into strips.

KinderPOP!, Gift Wrapping, Bow, Crafts, DIY
REA NICO ALFONSO/INQUIRER.net

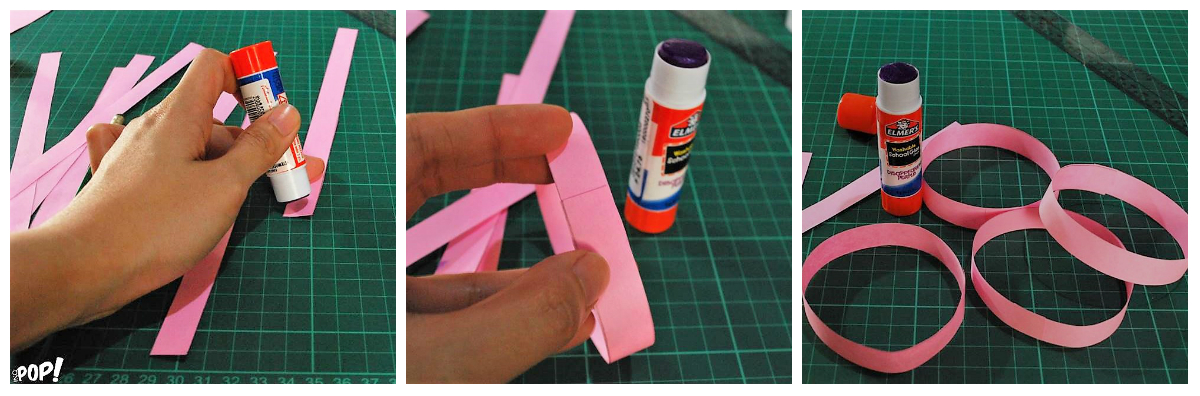
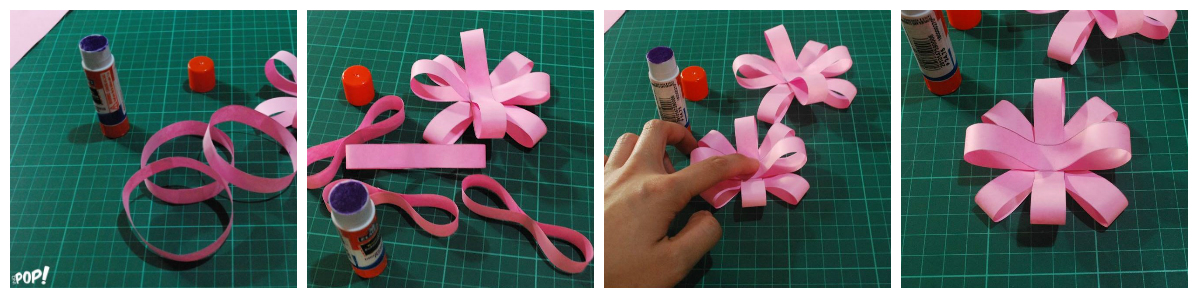
4. Take one end of the paper and glue it to the other end, making a ring. Do this for the 4 strips of paper. Make sure the rings are of the same size.

KinderPOP!, Gift Wrapping, Bow, Crafts, DIY
REA NICO ALFONSO/INQUIRER.net

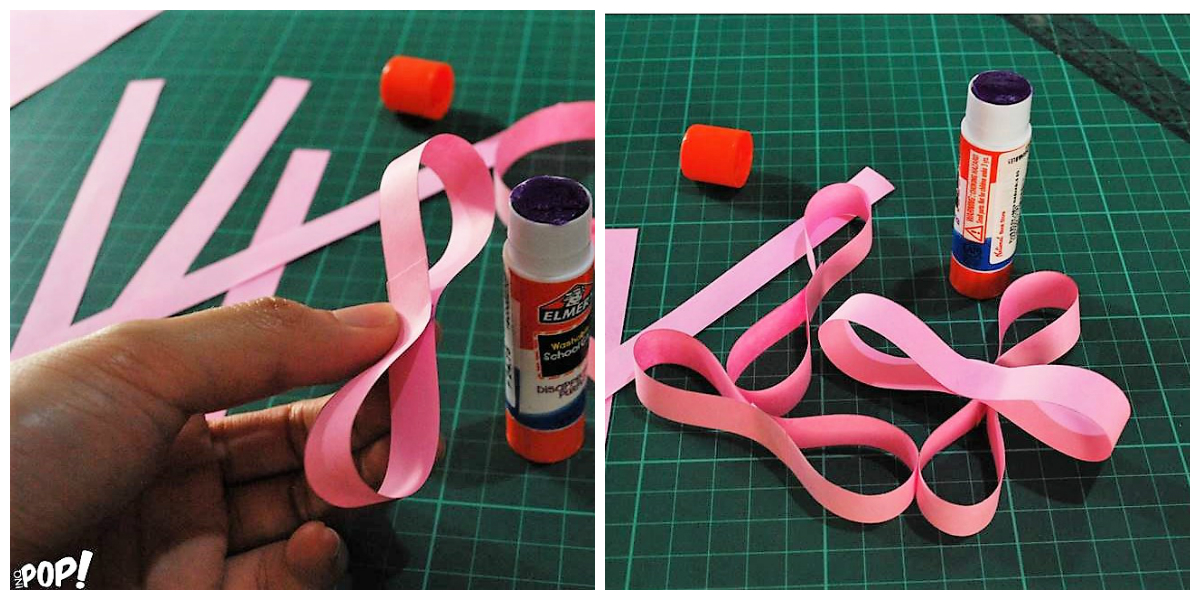
5. Once you have made all the strips into rings, glue the connected end to the other side. It should look like a bow. Do this for the rest of the rings. Again, make sure the folded rings are of the same size.

KinderPOP!, Gift Wrapping, Bow, Crafts, DIY
REA NICO ALFONSO/INQUIRER.net

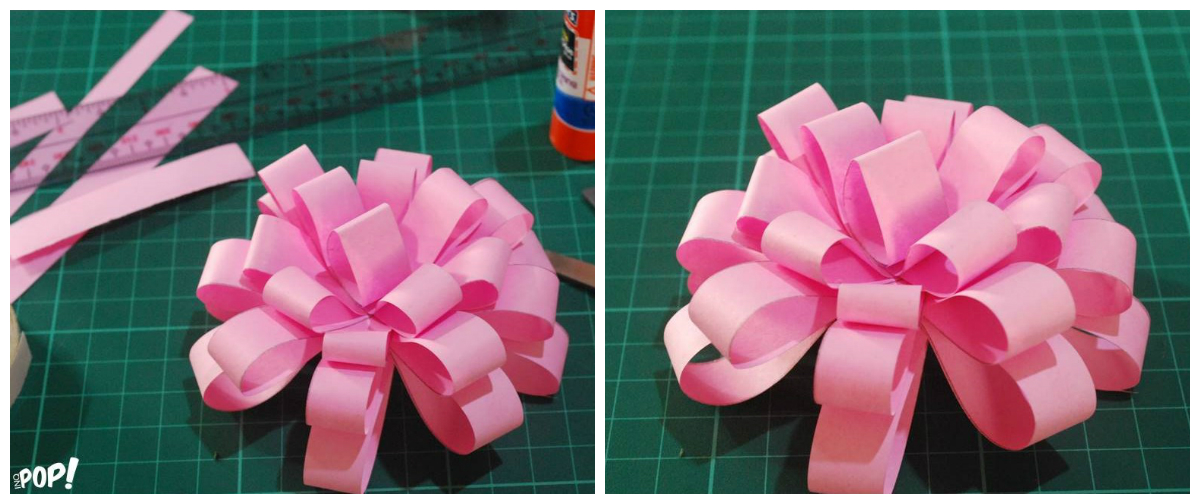
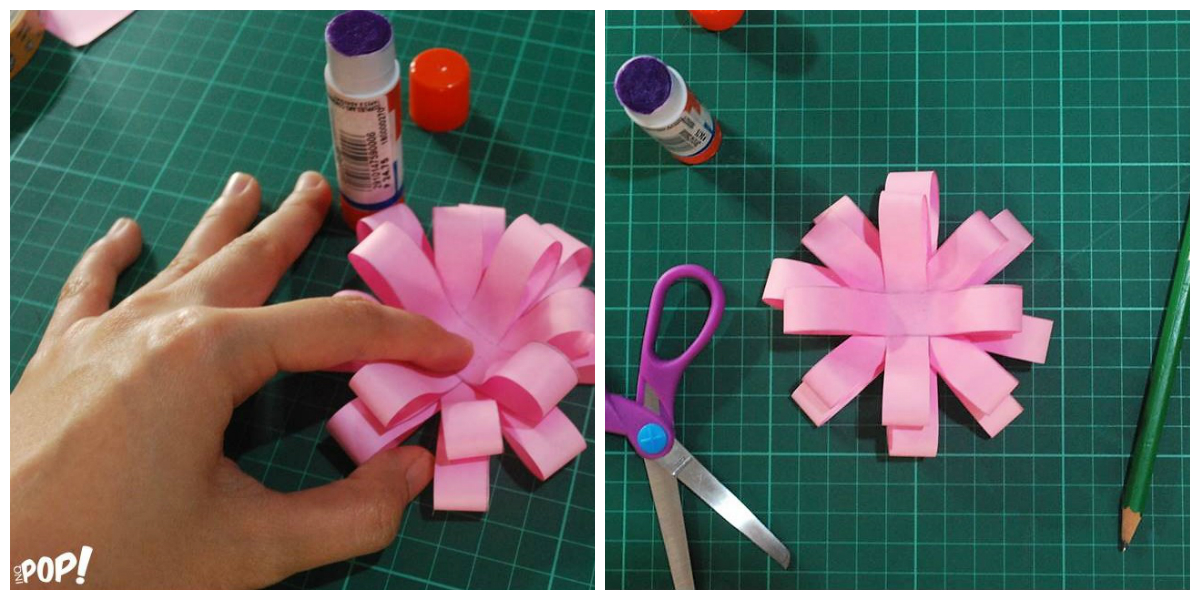
6. Afterwards, paste one bow on top of the other like a cross. Then add another by placing it diagonally to the left, and diagonally to the right.

KinderPOP!, Gift Wrapping, Bow, Crafts, DIY
REA NICO ALFONSO/INQUIRER.net

7. Repeat steps 4-6 for the remaining cut outs. This time make the sizes shorter and smaller than the previous ones when you fold them.

KinderPOP!, Gift Wrapping, Bow, Crafts, DIY
REA NICO ALFONSO/INQUIRER.net

Paste the smaller bow on top of the bigger bow. Your product should look like this:

KinderPOP!, Gift Wrapping, Bow, Crafts, DIY
REA NICO ALFONSO/INQUIRER.net

8. To complete the look, cut out a 2-inch long and half-inch wide piece of colored paper. Fold it to make a pyramid-like cut out like this:

KinderPOP!, Gift Wrapping, Bow, Crafts, DIY
REA NICO ALFONSO/INQUIRER.net

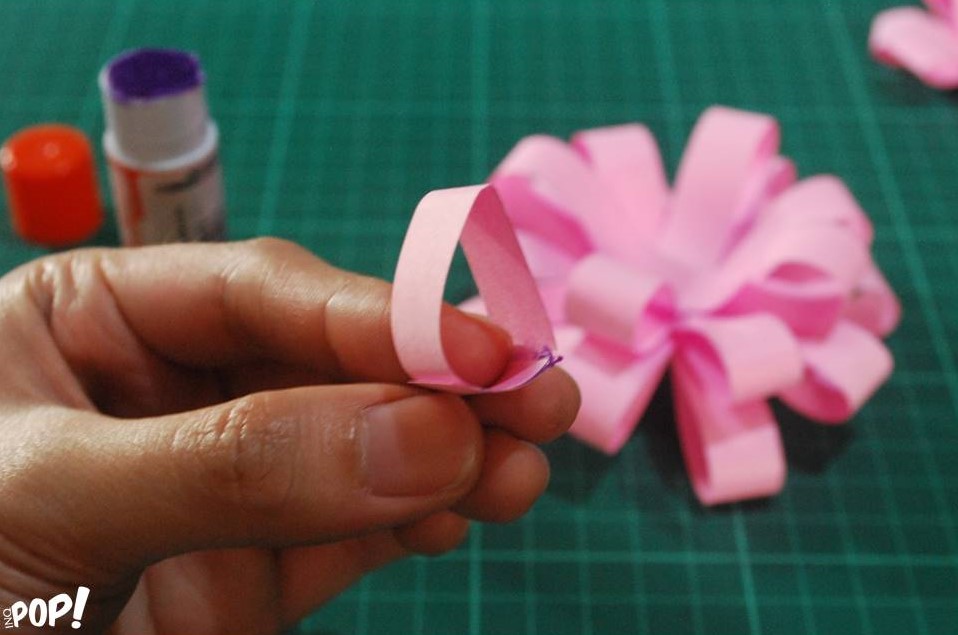
9. Glue it on top of the bow and–voila!–there’s your gift wrapping bow.

KinderPOP!, Gift Wrapping, Bow, Crafts, DIY
REA NICO ALFONSO/INQUIRER.net

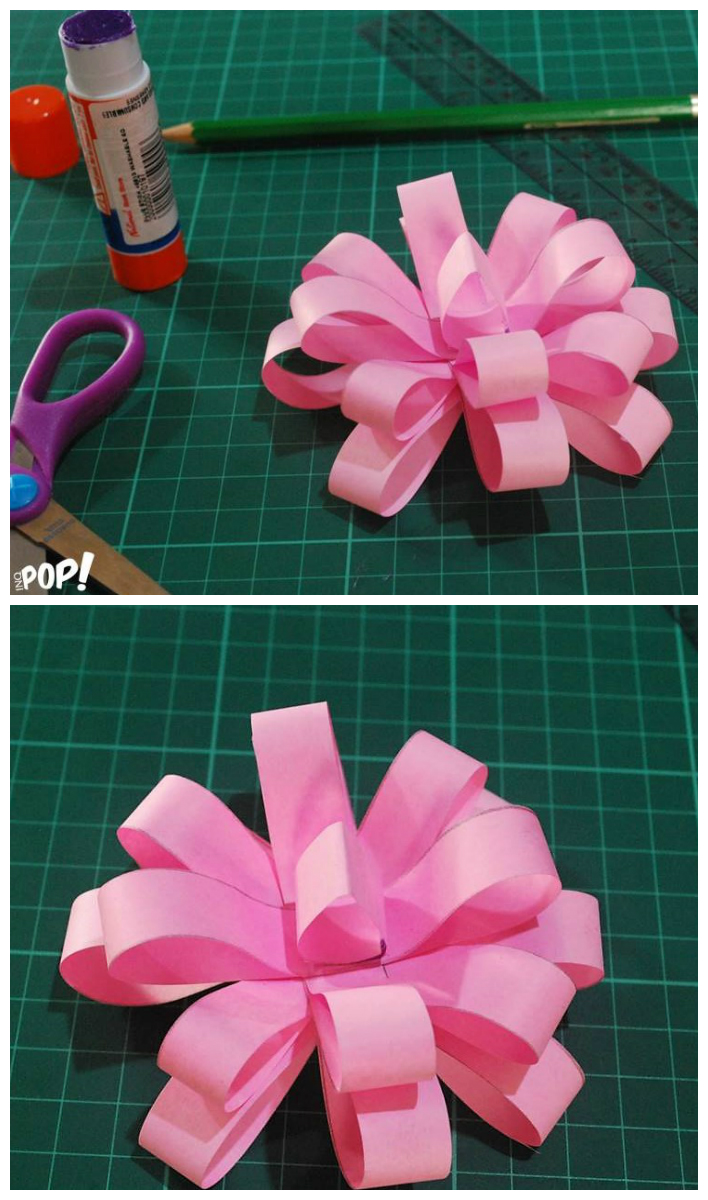
Tip: You can make bigger bows if you want and even add more layers. Just follow the same steps but with bigger strips. Feel free to use other materials aside from colored paper.

KinderPOP!, Gift Wrapping, Bow, Crafts, DIY
REA NICO ALFONSO/INQUIRER.net
About Author

Related Stories

Popping on POP!